Eclipse Day (Mar 20)

These are my photos of eclipse day from the viewing site near Longyearbyen, Svalbard, Norway.

An eclipse above the Arctic Circle in March was really a risk.  The weather prospects were at best 50/50.  But this was the place Jay Anderson thought had the best chance.  Not only was he right about the weather, but there was general agreement by all that this was the best eclipse ever.  The prominences were good. The corona was the most complex of any of my previous eclipses.


Svalbard mount in my driveway
click for a larger image
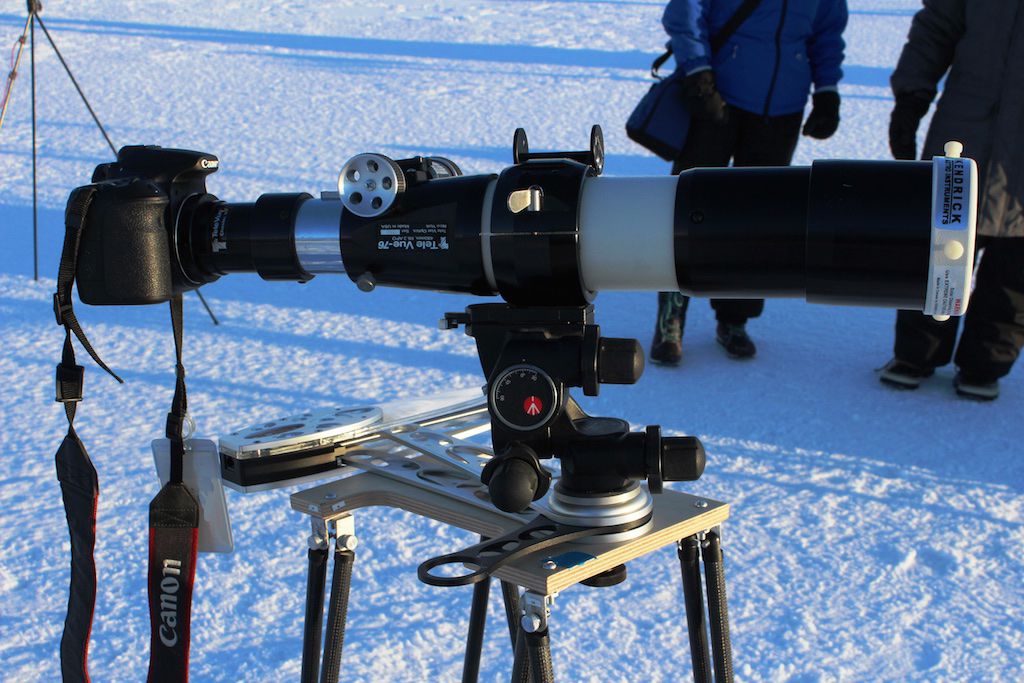
I started preparing for this eclipse in summer 2013.  At first the plan was to just repeat my 2006 Libya setup including full computer control.  That would have been ideal and would have resulted in pictures of the quality of 2006.  However, in early 2014 I learned that we would have rather severe weight limits.  So my computer and EQ-1 mount were staying at home.  Instead I designed a lightweight (1.5 Kg) platform that would give me polar alignment.  On this I placed an AstroTrac head to track the sun.  Finally a Manfrotto 410 geared head for fine positioning of the scope.

But enough grumbling about weight limits.  Thanks to TQ letting me know early everything worked out.


The Site

map of the 2015 eclipse
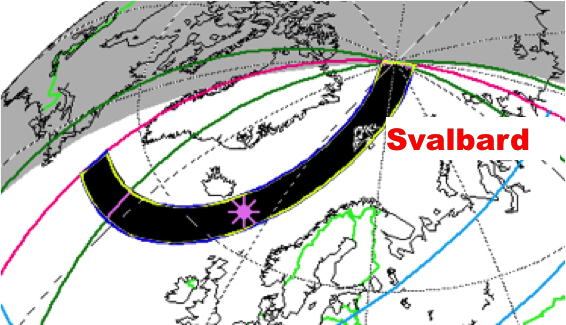
The figure to the left shows the path of totality.


We were just outside of Longyearbyen, Svalbard. Svalbard is one of the islands of the Spitsbergen Group, which is directly north of Norway at about 78° N. Our site was just off the road to the coal mine southeast of the city.

Capturing an eclipse in such an extreme environment had its own challenges.  First is the cold. We were lucky since the day was “warm”.  It was only -20° C (about 0° F).  Had there been wind it would have felt significantly colder.  Batteries, motors, and the other apparatus used for astronomy do not like such extreme cold. Our iPhones needed to be kept in waterproof containers next to our bodies. The cameras protected from condensation when we returned.


View Larger Map

The site was on the coal company land south of Longyearbyen.  Longyearbyen is in a valley so at this latitude the sun was going to be grazing the hills.  TQ managed to find a spot in the valley where there was a gap exactly in the right direction.  Talk about site planning!

The Weather

This eclipse was the one I most expected to lose to weather (or was that 2013 in the tropical rain belt?). We had had low clouds for several days. In the safety briefing1 the group meteorologist Jay Anderson reported that all of the weather systems had past.  We only had local weather to deal with.  He predicted before the trip that would work in our favor for a late morning eclipse.

I woke to cloudy skies.  Not what I preferred to see.  After a quick breakfast (and a live interview on the BBC morning show) we set out for the site about 7 AM.  It was a chilly -20° C (about 0° F).

Setting up


weather 7AM
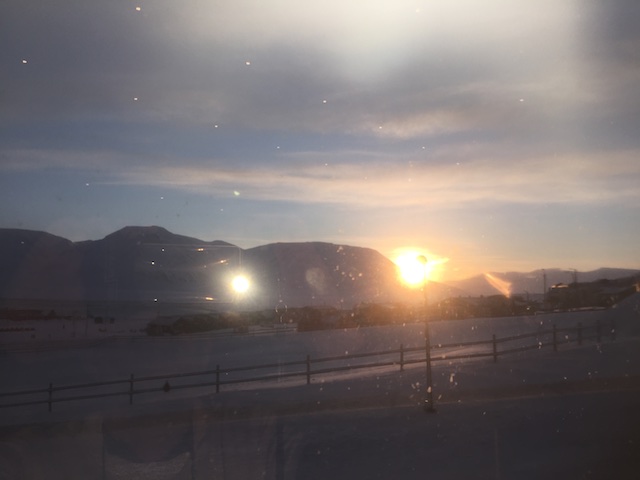
in the bus 7AM
Not the sky I was hoping for, but the eclipse is 5 hours away.
Gap at 7_30 AM
At the site 7:30 AM

Carrie trying to stay warm.

arrival at site
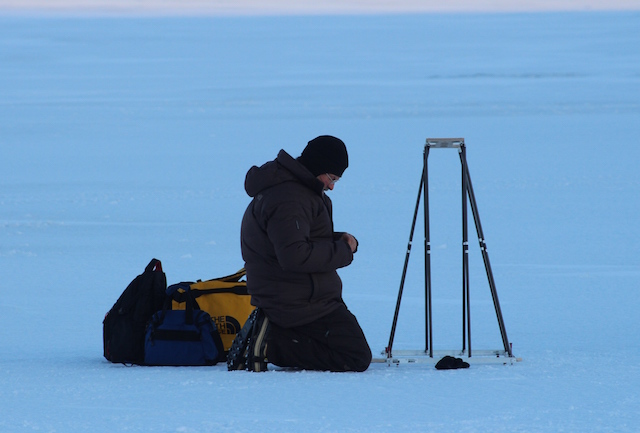
Beginning setup 8AM

courtesy Cheri Justis
staking mount to snow
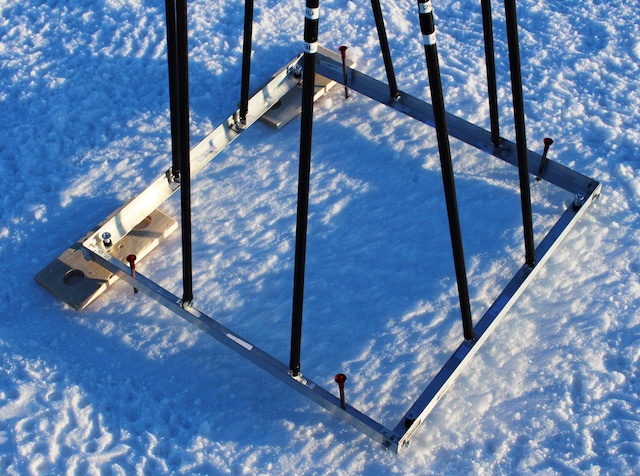
Staking the mount to the snow

courtesy Cheri Justis
Warming Hut and Eclipse shirt
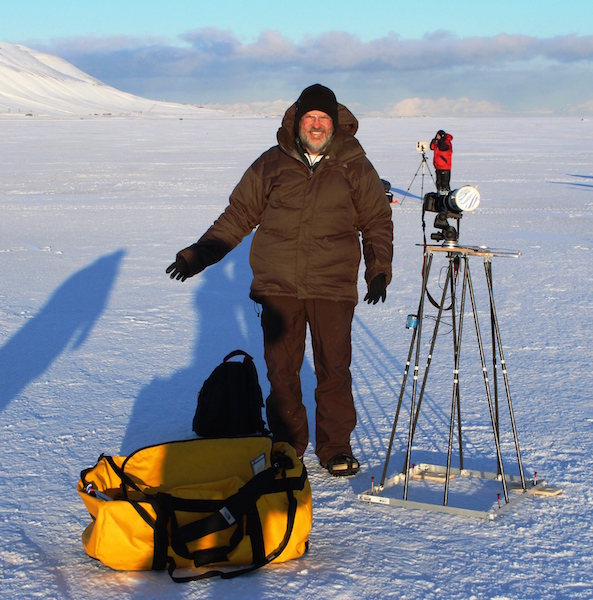
A Rob Tradition

On every previous trip I have always waited to wear the group shirt until it eclipse day.  Keeping with tradition meant putting the shirt deep under other layers. 

This also shows the warming hut that TQ provided in the background.  At this point that was an attractive thought.  During the rest of the day I was a little busy to enjoy the ambiance, but others greatly appreciated it.

courtesy Cheri Justis
Dressed for the weather
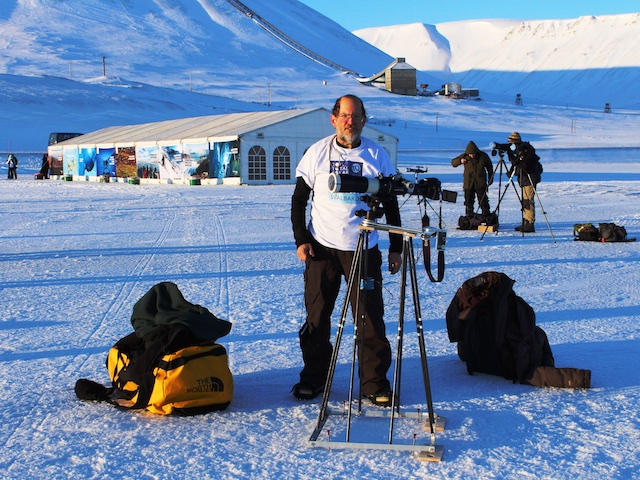
Here I am set up wearing the appropriate dress of the day.  Underneath I had a 300 fleece jacket on top of a 200 fleece pullover and thermal underwear.

courtesy Cheri Justis
View from warming hut 8 AM

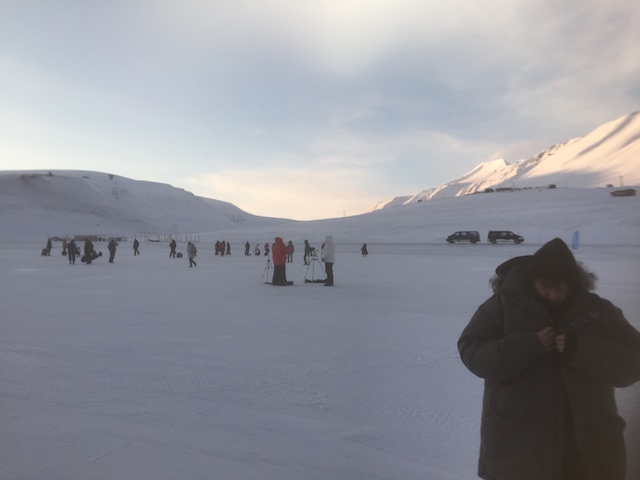
8AM it is now clear.  My setup is in the distance.  The gap where totality will occur is to the right.
Panorama of site
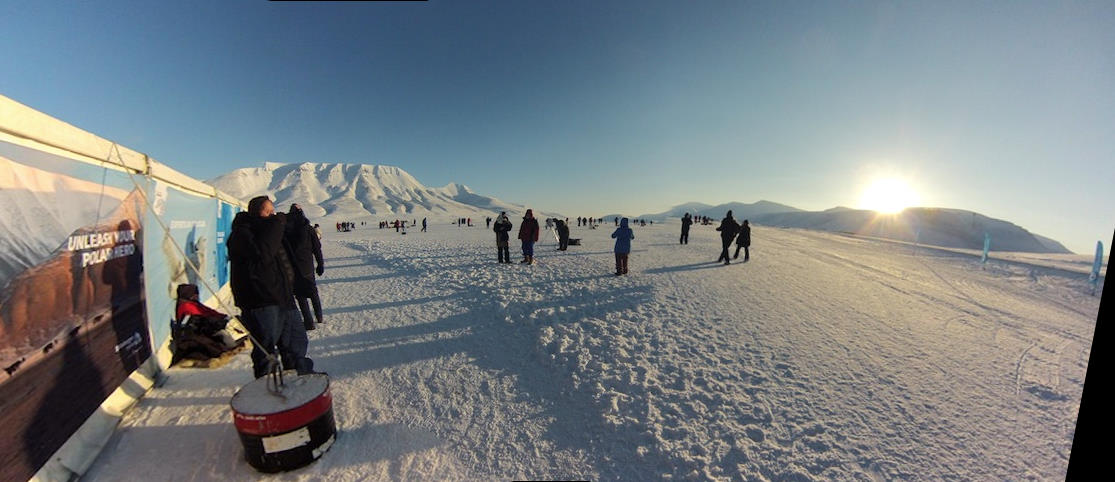
Panorama of Site

This is about a 270° view around the site. Longyearbyen is to the left in the clouds.  The gap is to the right where all the people are.  My friends Cheri and Lloyd are in the foreground.  You can also see the top of my platform.

Eclipse Photos

OK now on to the good stuff.  All times are local Longyearbyen (GMT+1) and may be up to 1 minute fast.  All images are using the Televue TV-76 which is f 6.3.  All were shot using a Canon 60Da at ISO 200.

I set the equipment up and had the AstroTrac running for about 15 minutes at the start of the eclipse.  I then shut it down to warm the battery and reset.  About 1/2 hour later I restarted (with enough time to complete the eclipse before the Astrotrac reset).  Unfortunately I had some problems at that point as I describe below.

In all of the pictures below you can click for a higher resolution picture.


Partial Phases


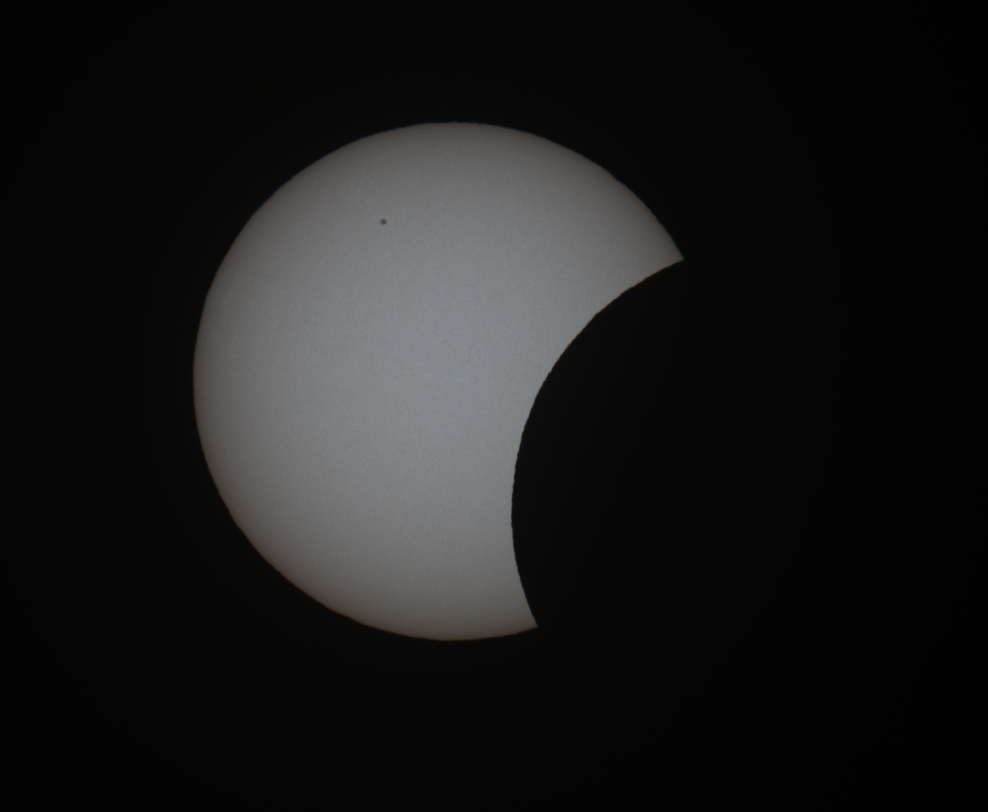
Partial Eclipse at 10:32:33
(1/640)
Partial Eclipse 11 02 42
(1/640)
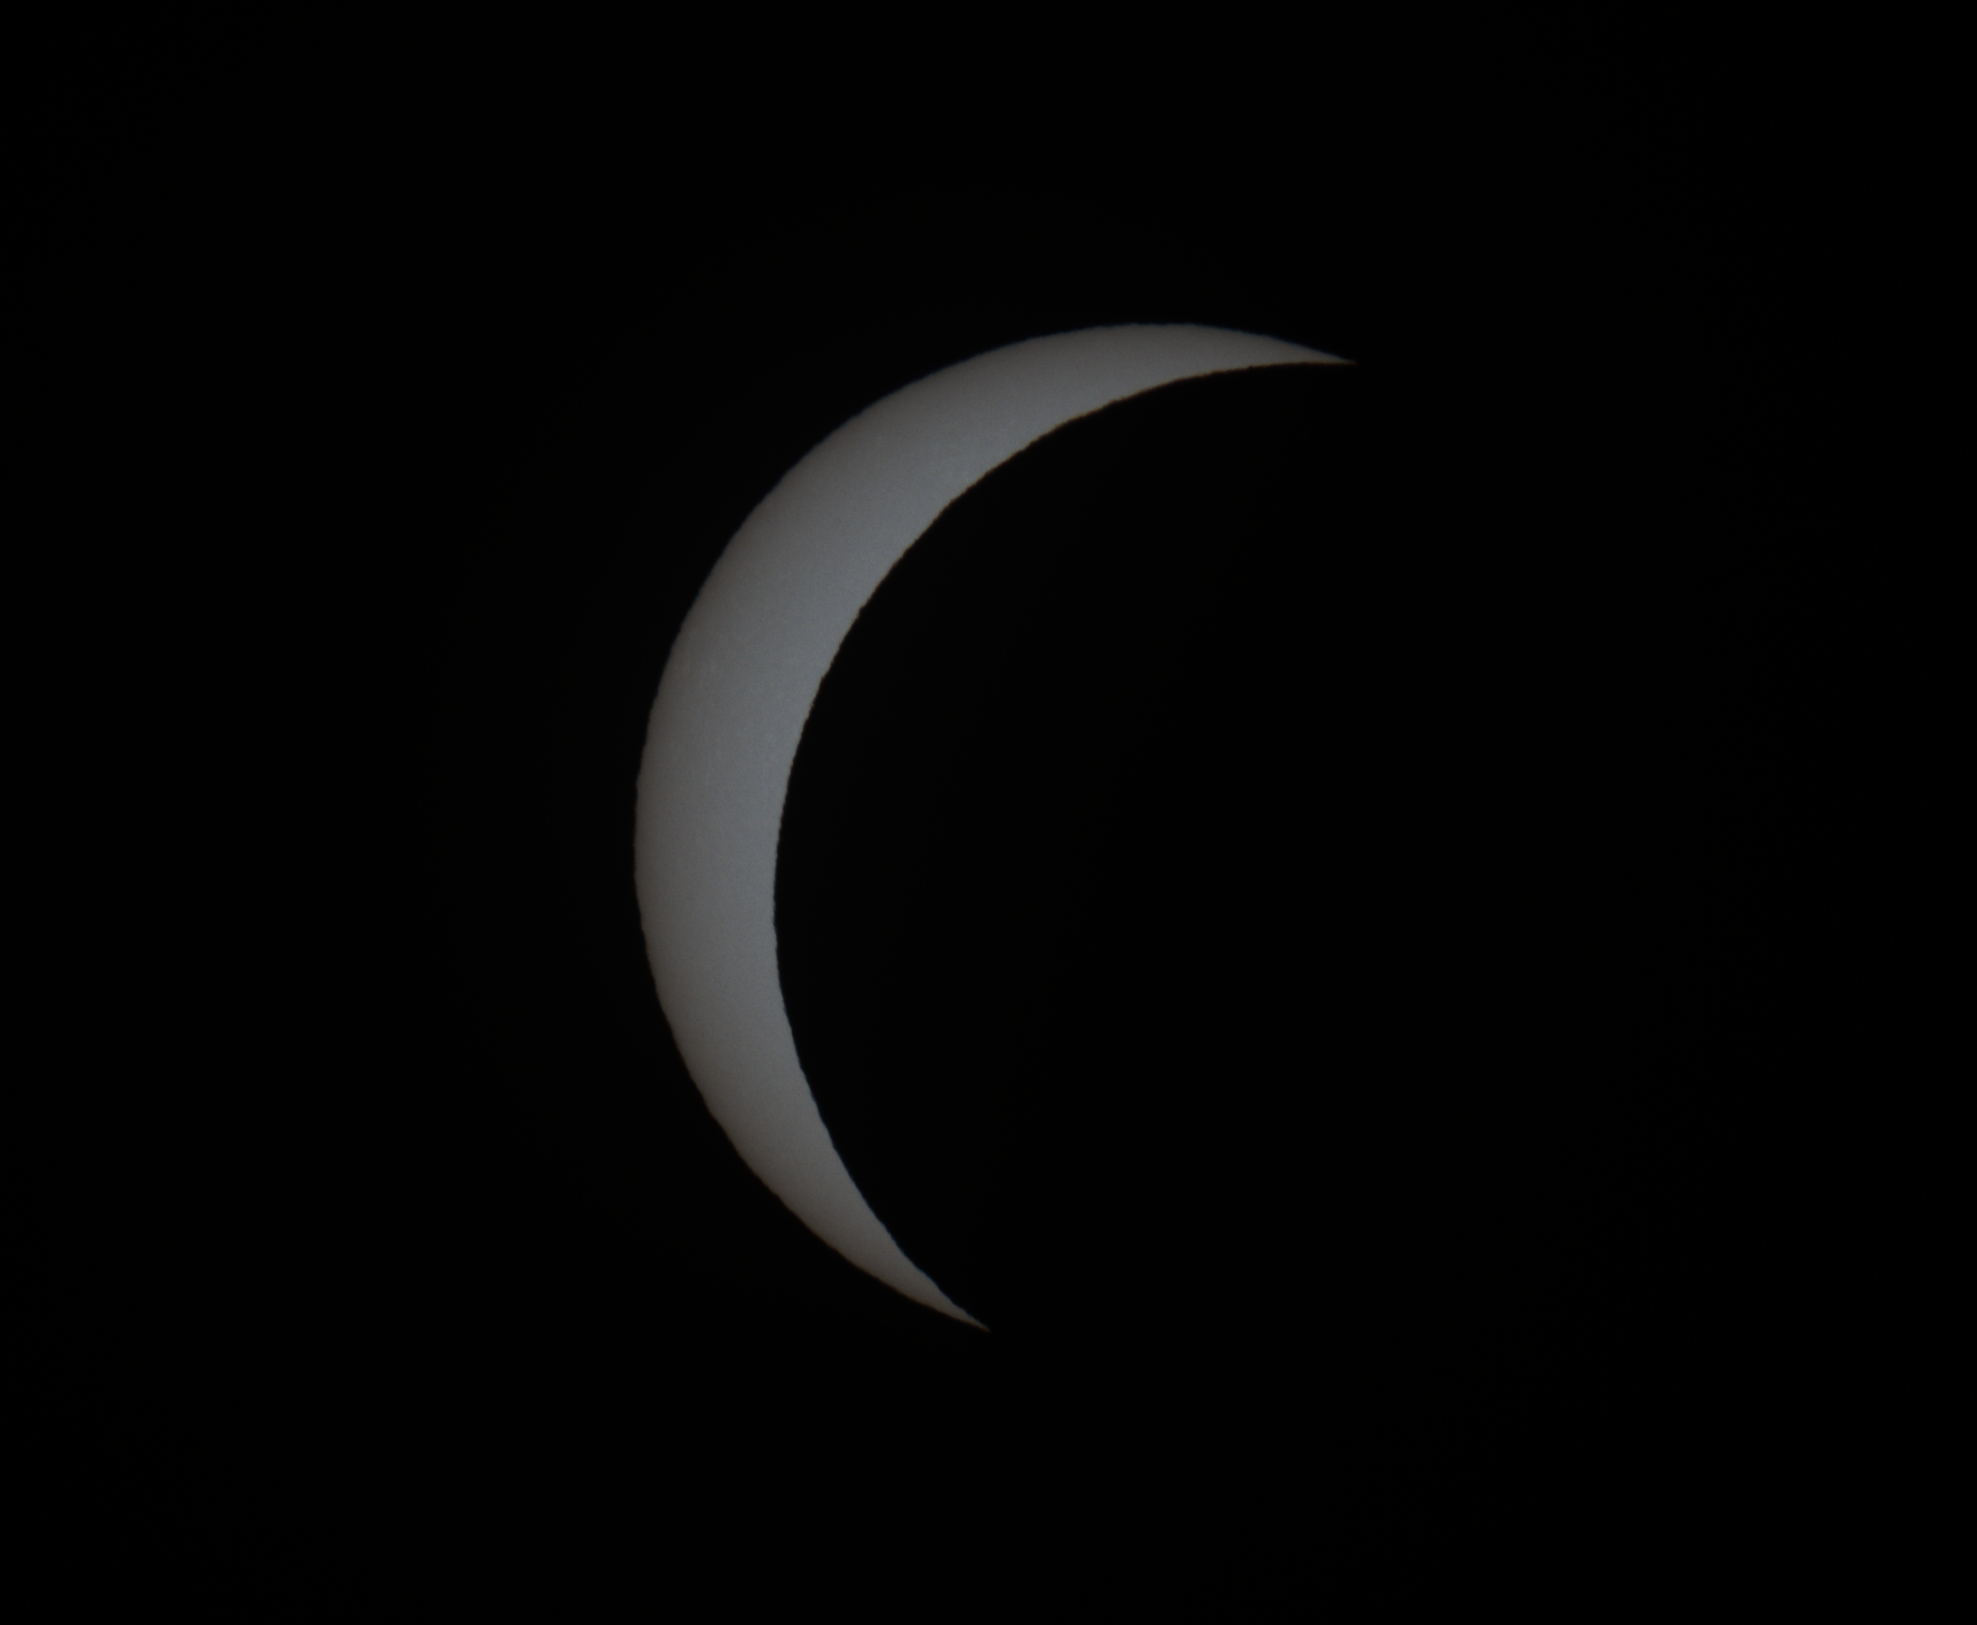
2nd Contact

I cover the telescope with a hat about 5 minutes before C2.  The mount was not tracking perfectly and I was not watching the SolSeeker finder.  Thus when C2 happened the sun had drifted from the frame.  Fortunately I noticed this almost immediately and adjusted the pointing.  You can see my typical routine in the movie below.

Shortly after Second Contact
11:12:01   1/640

HDR Images

One of the challenges of imaging a solar eclipse is that the brightness of the parts of the eclipse vary greatly. The eye can see brightnesses that are orders of magnitude different.  The camera is only able to capture a limited range of brightnesses at a time. With my configuration the ultra bright Chromosphere requires very short exposures (1/5000). The beginnings of the inner corona something like 1/640. The inner even slower (1/80). Finally the wispy parts of the outer corona require something like 1/20 or slower at ISO 200.  During this eclipse I used bracketing to capture ±3 f stops around the central exposure of 1/640.  I was not able to get the slowest and would likely have not gotten good results at that slow speed anyway.

To try to simulate what we saw visually I selected 3 images taken at 11:13:05 (:06 and :07) and combined them using PixInsight.  The prominences are not nearly as visible when compared to what you can see with your eye, but that is the sacrifice of using a linear sensor with only 65,000 levels of brightness and then trying to display it on a display with only 256 levels of brightness.

1/640 component of HDR

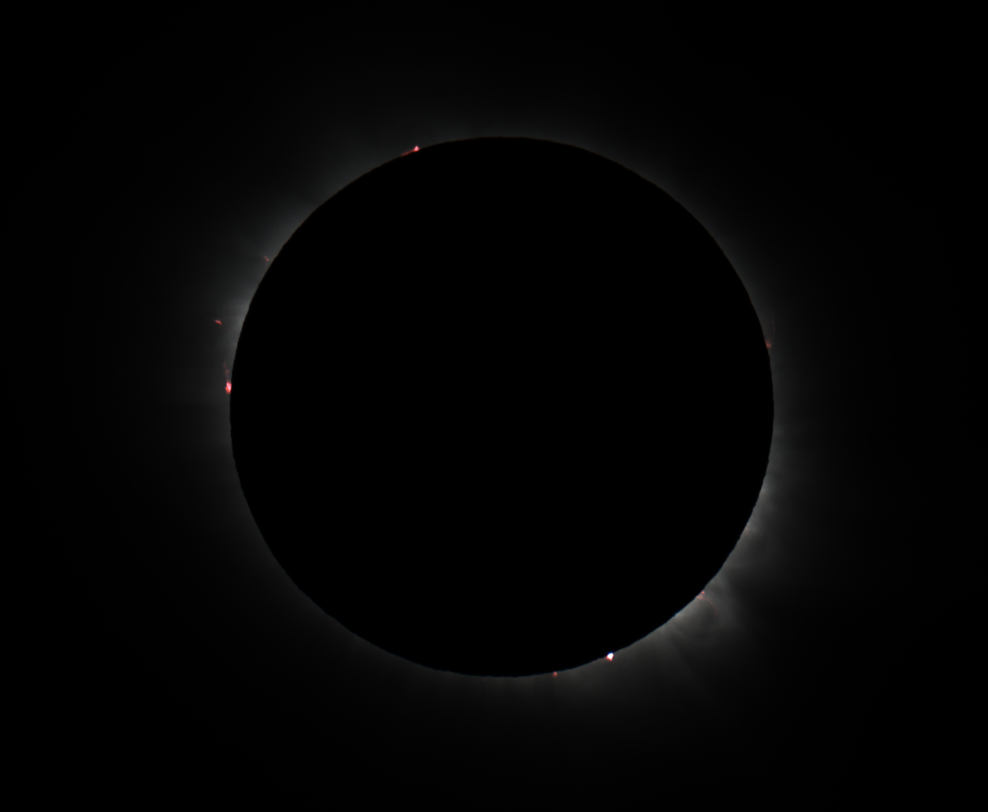
1/640 component of HDR image

Unfortunately if you want contrast then you have to be selective what you show.  The two images below are derived from the same combined image.  In the case of the left image I enhanced the portions of the corona closest to the sun.  I tried to mask the prominences that you can see in the picture above; however, by increasing the brightness of the surrounding corona one loses the vast contrast difference that happens in real life.

For the image on the right I masked the inner most portions of the inner corona to prevent them from saturating.  That allowed me to show more contrast on the dimmer outer sections at the cost of some loss in detail in the inner corona.

Normally I get accused of overprocessing my images. In this case the fine detail shown below is what I saw with my eyes.

HDR processed for inner corona

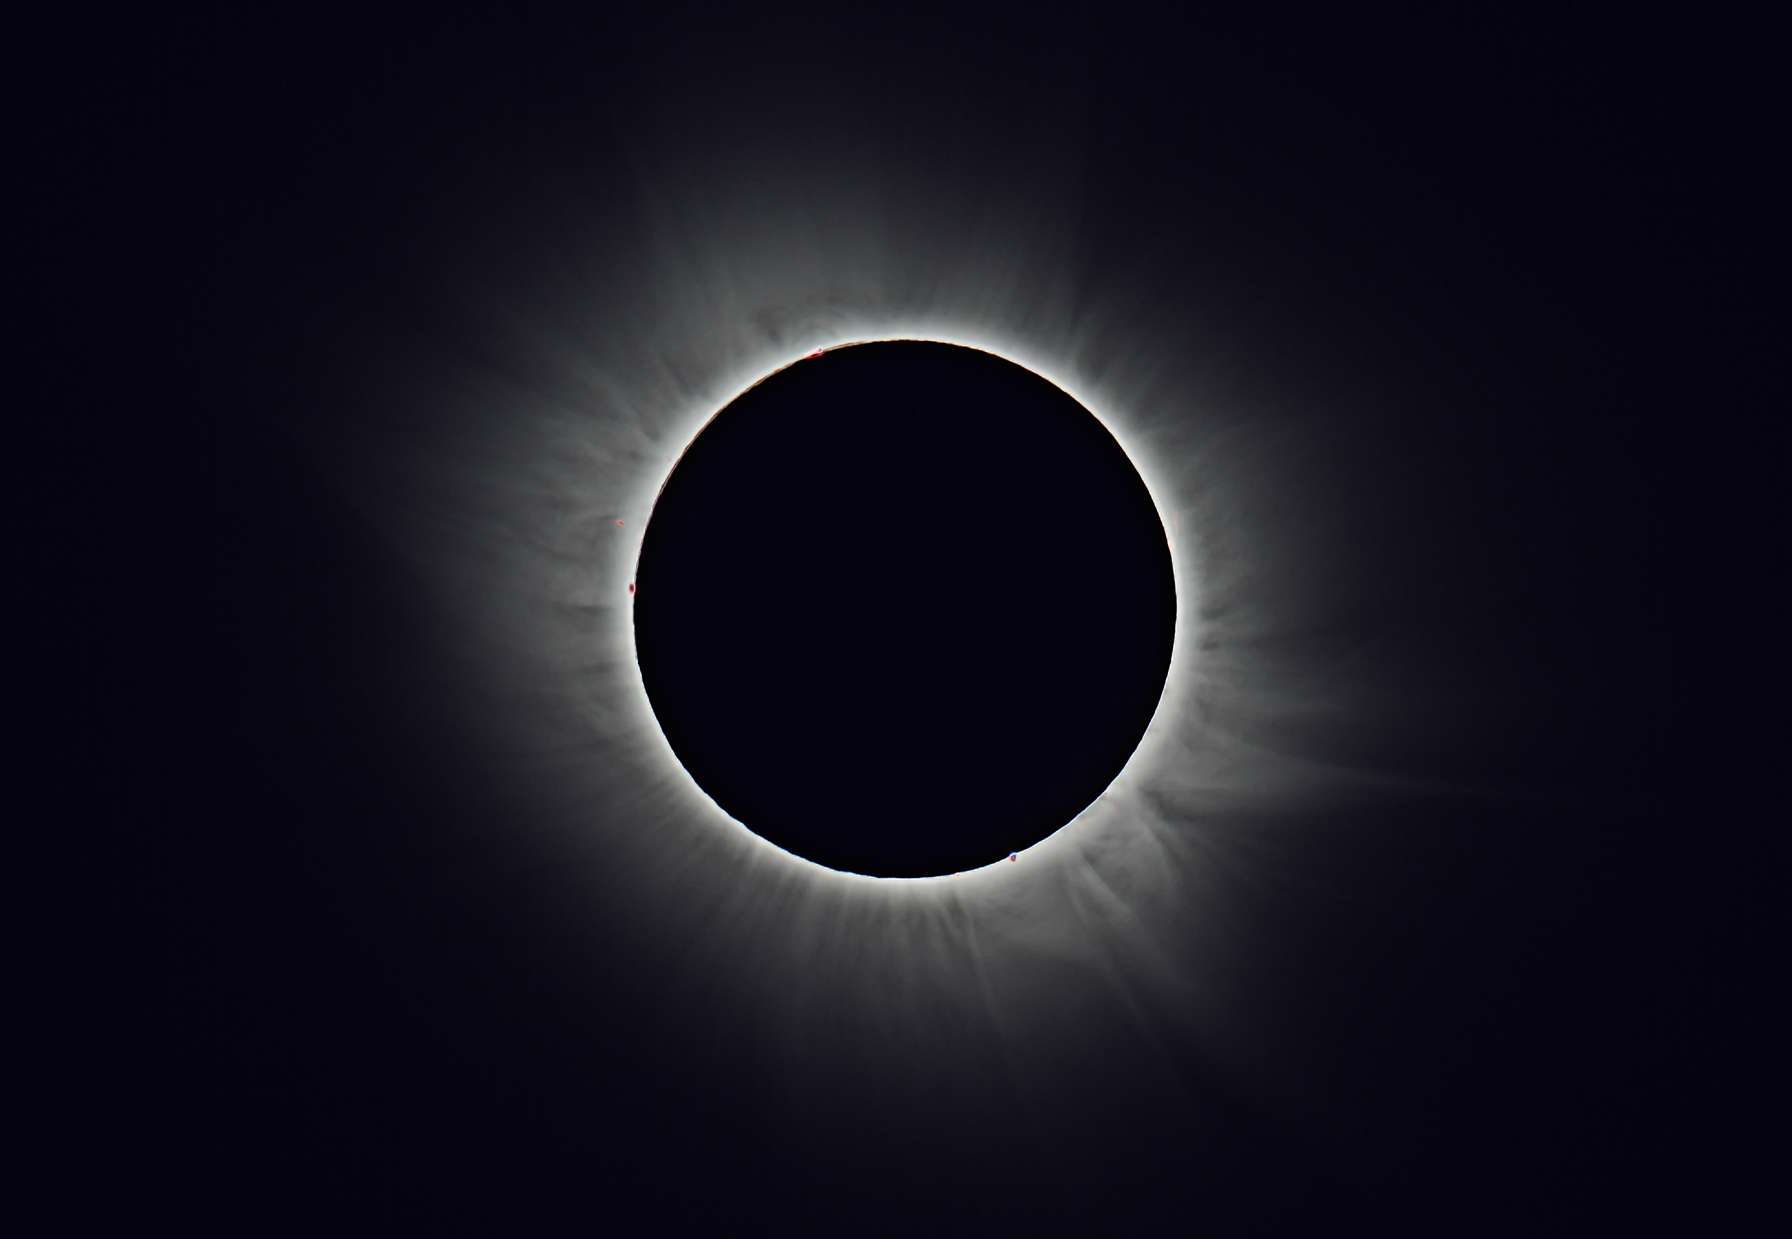
Processed to emphasize inner corona
HDR processed for outer corona

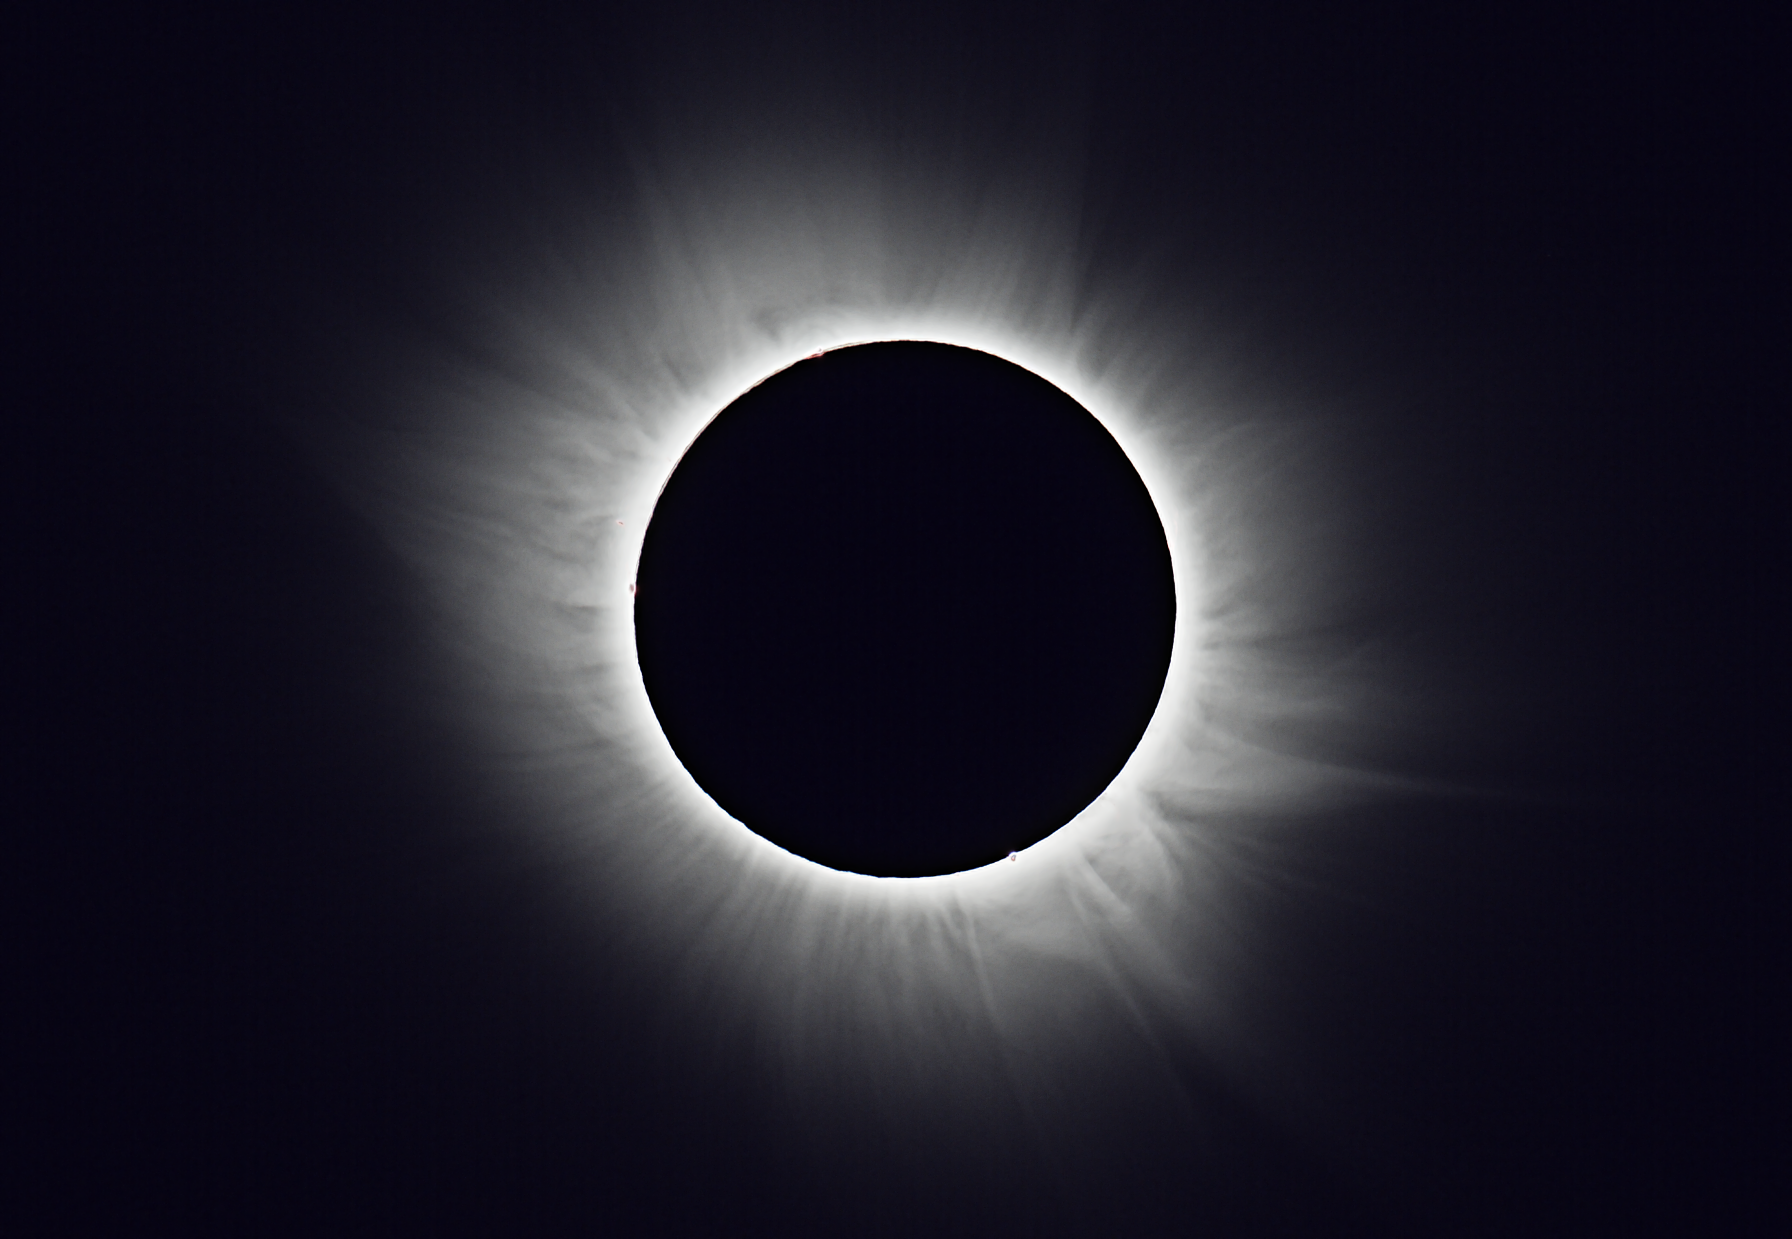
Processed to emphasize Outer Corona
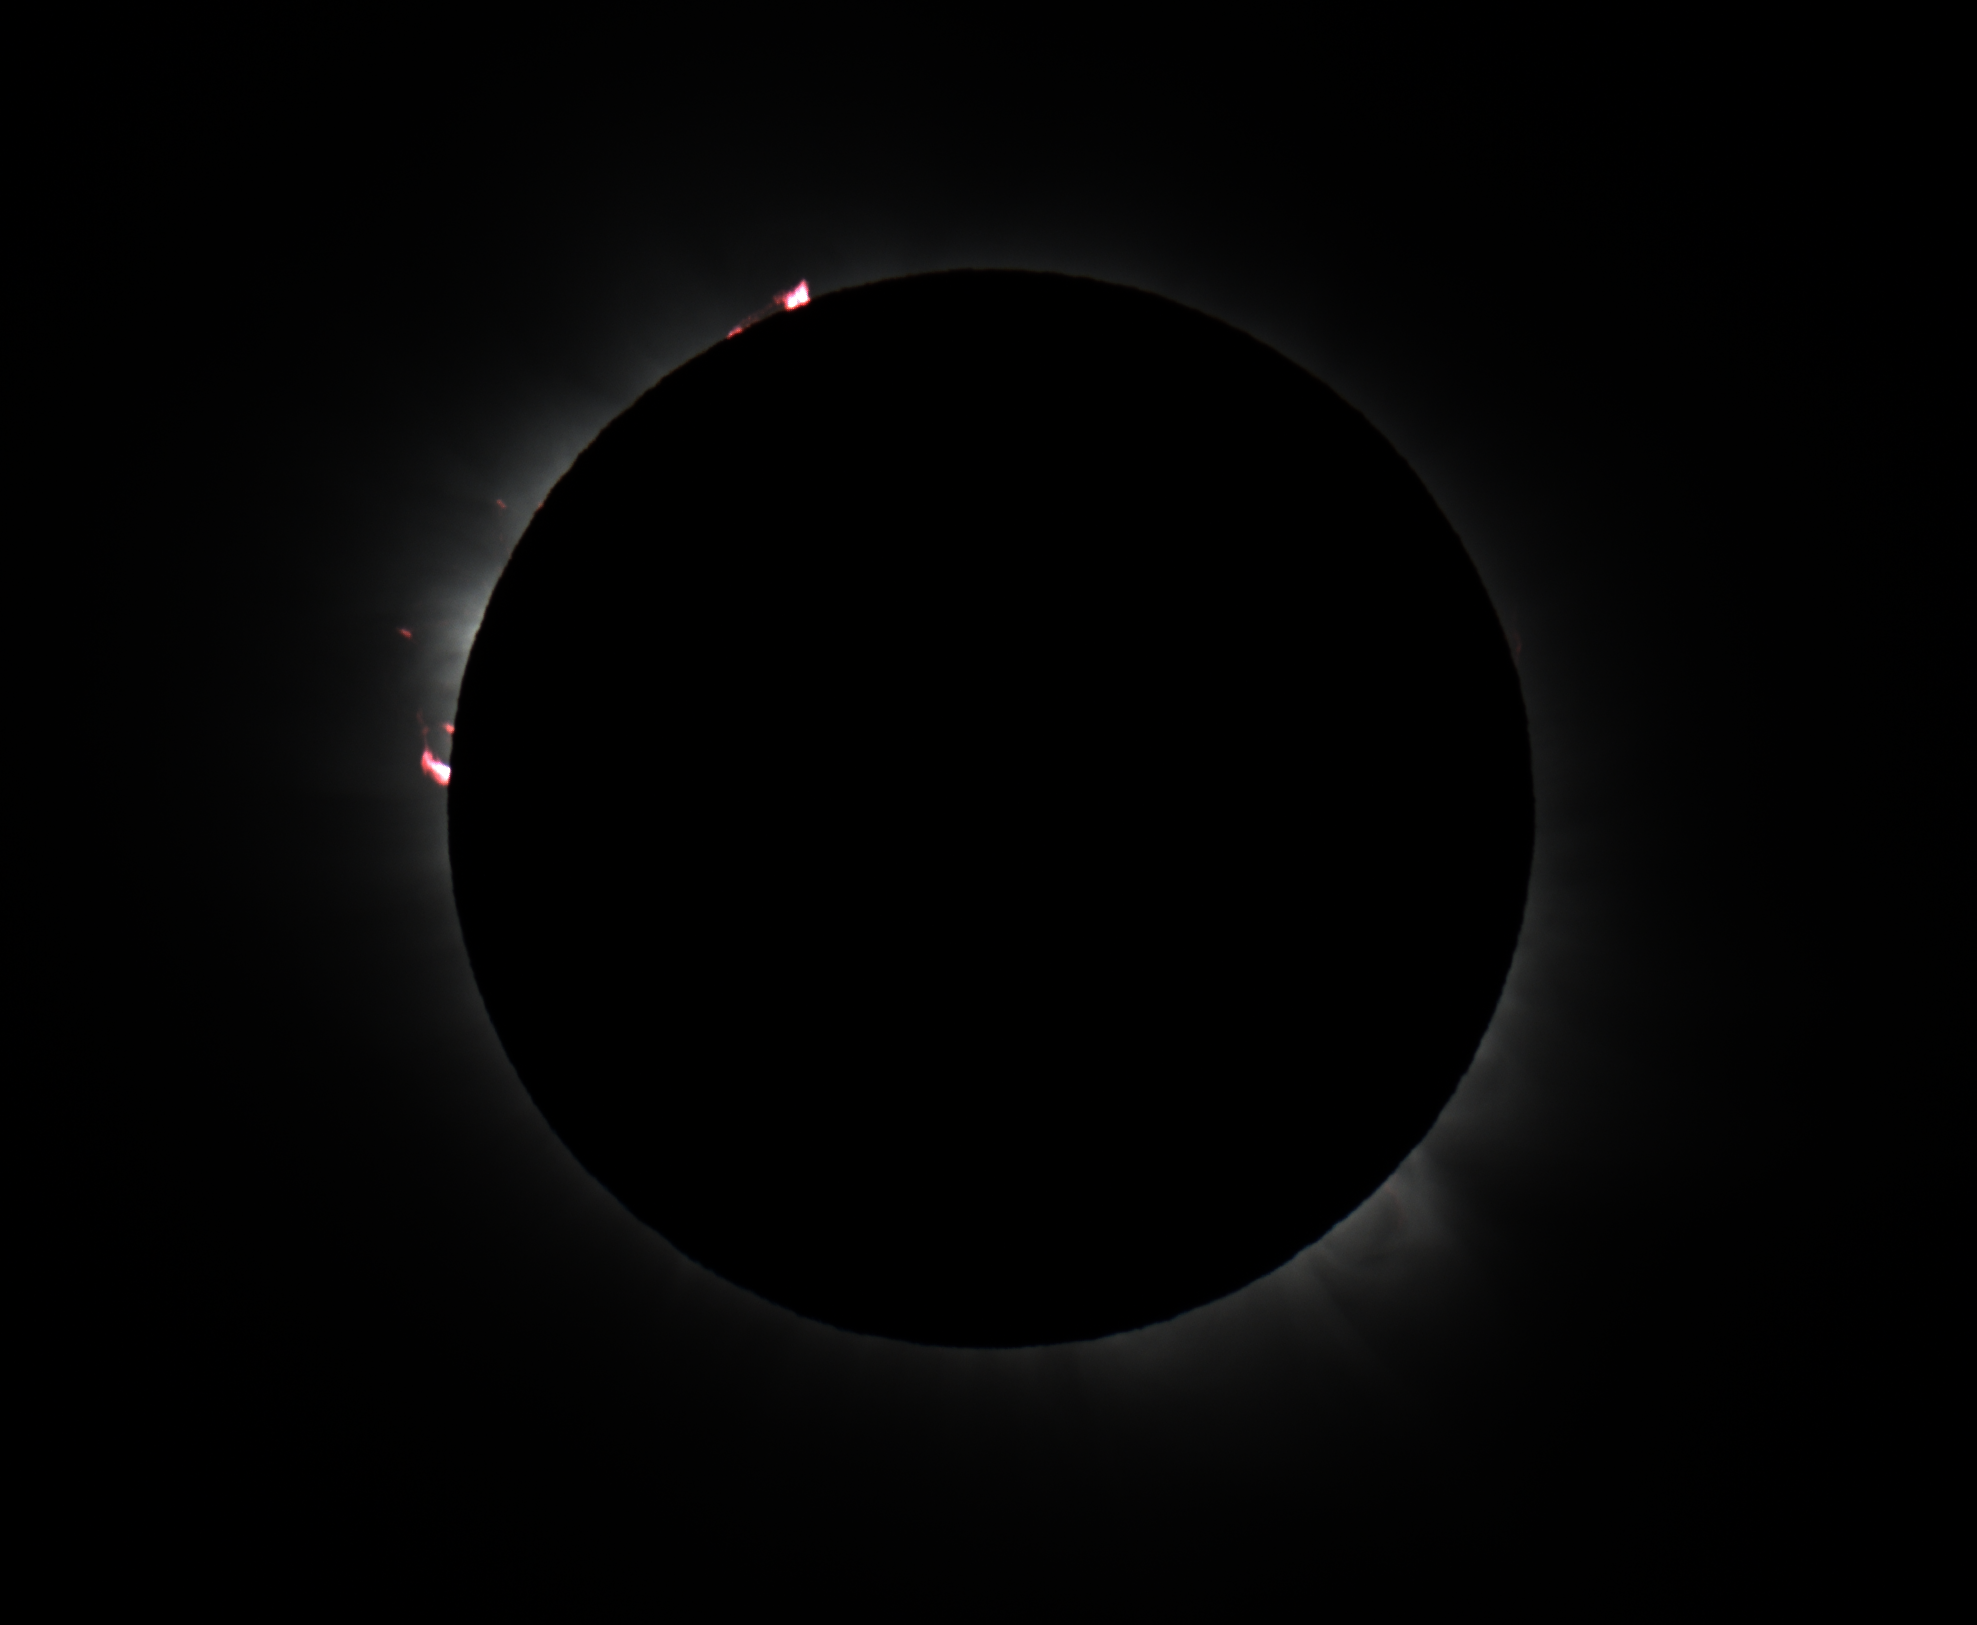


3rd Contact

Unlike the problems at C2 I was ready for C3.  Here is a sequence of images taken as the Sun re-emerged.

11:13:40 at 1/640

11:13:40 at 1/640
Chromosphere before sun surface
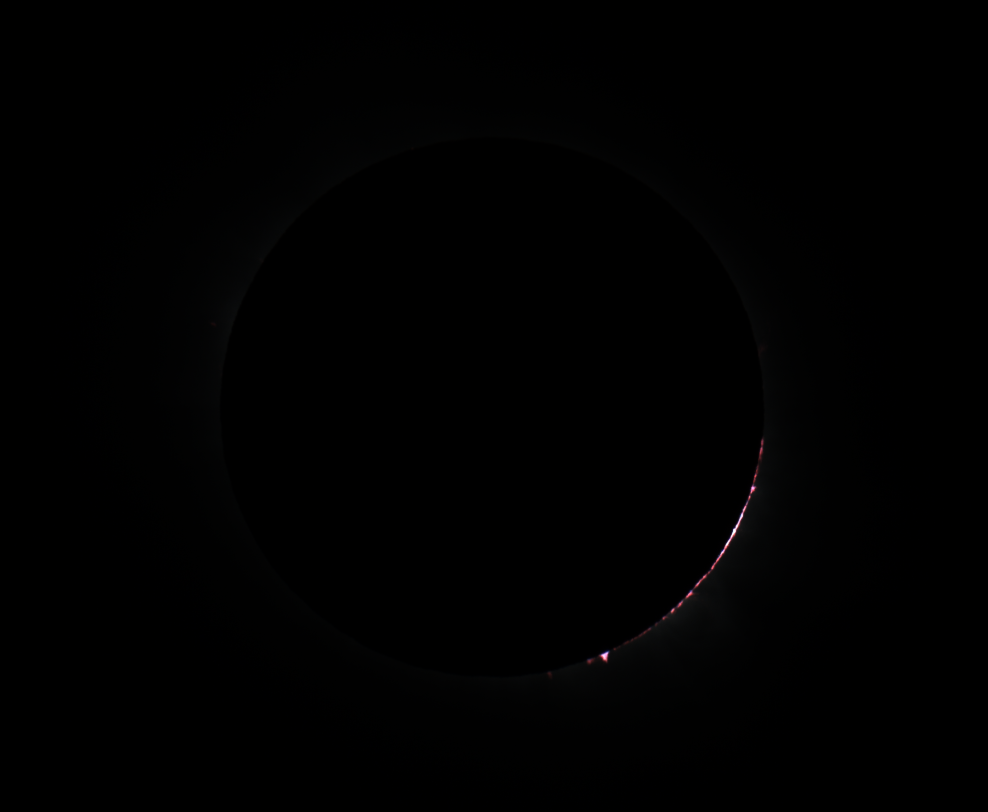
Chromosphere
11:13:42 1/5000
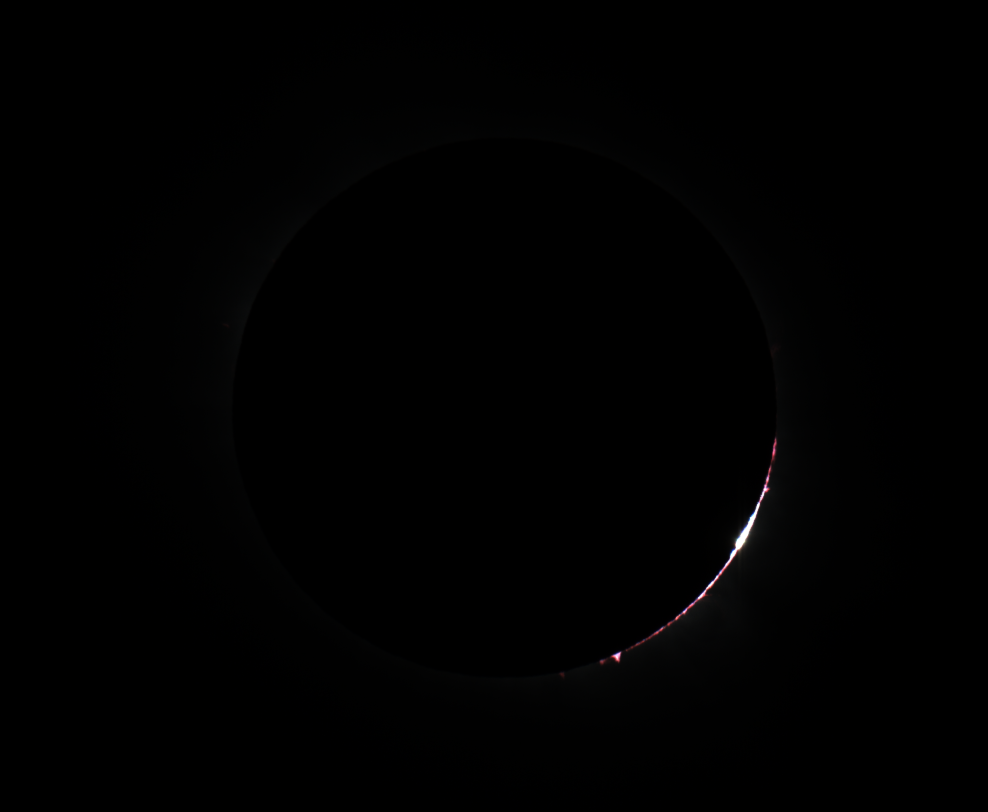
Baily's Beads 11:13:45 1/5000
Diamond Ring 11:13:46 1/640


Experience the Eclipse


Equipment and Lessons Learned

My Optics for this trip are similar to what I used in Libya in 2006 and in Easter Island in 2010.  I switched out my older 20Da for a 60Da.  That turned out to be important.  The 60Da allows a ±3 f-stop bracket which is what I required to make this plan work without a computer.

I also left my trusty EQ-1 mount at home.  The platform breaks down to easily fit in a suitcase and weights just 1.5 Kg (about one of the EQ-1 counterweights). The Astrotrac and Manfrotto add an extra Kg each.


Rob's equipment for the eclipsecourtesy Cheri Justis


Unfortunately the AstroTrac did not like the cold.  Using it in the day in a noisy environment made it hard to hear/see the prompts.  The electrical connector was very flaky.  Finally both the drive and batteries got too cold.

In 2021 I get to do this again. Instead of 80° N I will be 80° south back at Union Glacier.  What I will do then replace the wires to the battery pack.  I will also put two heating pads on the batteries (instead of one) and insulate them.  Finally I will attach a heat pad to the mount itself.

People Pictures

As I fussed with equipment my wife circulated and got some images of people.  I will include these in the trip pages.

Copyright


Creative Commons License
The Svalbard 2015 pages by Robert J. Hawley are licensed under a Creative Commons Attribution-Noncommercial-Share Alike 3.0 United States License. This permits the non commercial use of the material on this site, either in whole or in part, in other works provided that I am credited for the work and you apply this or similar license to the result. Some of the included works bear a similar copyright. 

rjh 4/11/15

1 Yes there is a safety briefing.  Looking at the partial phases is dangerous if you do not exert some caution. We were all issued eclipse viewers. Totality is perfectly safe.