Program Details
This page will provide detailed information on the use of the program. In many cases it will do so by referring back to previous sections.
Supported Cameras
This program requires use of one of several Canon listed in Supported Camera List
We support any lens that is compatible with Canon. We also support direct connection to a telescope.
Note that different camera have different levels of support. Some of the cameras that the app will support have restrictions on their use or, conversely, have added support for their specific features. Please look at the information provided to see where your camera falls.
I strongly recommend that you power cycle the camera before connecting. If there is a connection problem exit the program and start again.
I recommend you put in an empty, high speed chip to collect your eclipse photos. The Canon software takes a considerable time to restart if there are pictures already on the chip. It may also delay the camera save times.
GPS
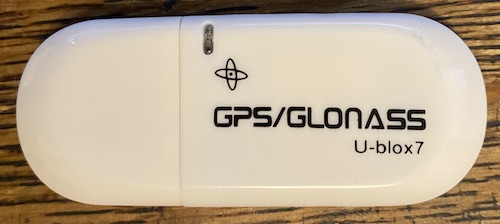
This program supports GPS dongles using the Ublox7 chip such as Stemedu VK172 USB GPS Dongle
Using the device is easy. Plug it in. One caveat mentioned in the other pages. It may take up to 15 minutes to be usable as a time source. Depending on how long since it was last plugged in it may also take a while to get position. The chip does not require this program to be running to get location. Once power is applied it just needs clear sky.
Support for a GPS is enabled in the Site->new item. If you plug the device in after you get past that point you will have to restart. Once in the program will do the rest.
The status display window can be in the background or closed. The GPS does not require it to run.
The two status displays are
- Fix 3D This means that the chip has enough confidence in its location that it can make a height prediction
- Time Ref The chip has received information from the satellite to map GPS time into UTC. In other words it can be used as a time reference
Fix Quality is a gross indication of how good the fix is. The chip returns this, but I am not sure how useful it really is. The key is whether there is a 3D Fix
Satellites This give some indication of the sources of the fix. For this chip this can be a combination of GPS (US) and Glosnass (Russian).
Main Window
The main window was previously described in the main page. This amplifies a bit on what was said there
- The site information is on the upper left. This lists the user's site name (which is used in Site->Open). It gives the lat long of the site. Note that if a GPS is in use and we are running this does not track the GPS location. Instead "Location" tasks are included in the task list. Since every location update means the times of the C's need to be recalculated this insures that this can be done without disrupting the script.
- The current camera state is to the right of the site
- Below the site are two time displays.
- The display labeled "Run Time" is what time the program thinks it is. Tasks will be triggered based on this time.
In one of the operational time modes Time this will show a correction to a poorly sync'd system clock (or a correct system clock if you have properly synced the time).
The practice modes are similar but the offset is chosen so the particular C is a convienient time in the future. - System Time this is the current clock in the computer. This is more of an FYI since all of the processing is based on Run Time
- The display labeled "Run Time" is what time the program thinks it is. Tasks will be triggered based on this time.
- Moving to the upper right is the big Run button. It is big and obvious since when you are on site the last thing you
want is to be searching for it. If you have a touchbar equipped Mac® then the button will also be in the touchbar.

The button changes to Stop when the program is running. The program can cycle between run and stop as many times as required. In fact, it is recommended about 15 minutes before totality you hit stop and refocus. You can then resume by hitting run again. - To the left of the Run/Stop Button shows the running mode. The operational modes are in green, practice times in orange, and Emergency is red.
- Below the Run button is the event list. This provides the actual times when the events will occur. These will agree with the "Run Time" time. The column to the right is the time in "System Time". This can be safely ignored.
-
Last but not least is the task list. This is a time ordered set of tasks. This is the definition of the columns
- Countdown This give the time until the event. Task times are relative to an event from the event list. If we are stopped it gives the offset from the event. If we are running it gives the time when the event will occur.
- EventThis is the type of the task. Choices are Image, Burst (a series of images), Play, and Location (a point where the event times will be recalculated). Note that the latter is only present when the GPS is being used
- Trigger TimeThis is the time the event will occur (based on Run Time)
- Exposure
- Comment Gives the reason for this exposures such as "Chromosphere" or "Partial 10%"
Menus
The first thing that someone will notice about the menus is that they are not organized like a typical program. That is because the eclipse is not a "Document". In fact the task list is generated on the fly by the results of 3 different inputs
- The Site
- The Camera
- The Scenario
Instead of trying to stuff this program into the document model I break the three types of input out separately since, for example, there are operations relative to the camera that have nothing to do with the running task list.
Note also that when the program starts it will guide the user through the 3 categories so actually using the menus should not be common. If you do want to use the menus just cancel at some point. That, for example, is how you can start the camera before defining a site.
Here are the details of the menus
Site
New
This is used to create a new site. In this you select an eclipse from the combo box, enter a site name which will be used to describe this configuration, and enter the coordinates. You will only be allowed to proceed if this site is within the band of totality. When you press Save you will go to opening the camera.
If you intend to use a GPS then the GPS is only detected using this menu item.
Note the collection of special buttons at the top. These are the predefined sites I have included for learning.
- 2026 Spain> A site in northern Spain
- 2027 Annular Annular eclipse in Mar del Plata, Argentina
- 2026 Moving Ship The 2026 eclipse from a moving ship near Iceland
- 2027 Luxor The 2027 Eclipse from Luxor, Egypt
The app will report the value of ΔT and the age of this value. If the age for an eclipse in the near future is more then 6 months you may have an old version of the app (or I have not been diligent of updating). You may have to manually create the Bessel as described elsewhere.
Open
When you rerun the program after creating a site you will be brought into the Open dialog. Here you select one of the sites you have previously defined. You can also delete an existing site.
As described in "New" the app will report if the ΔT for an eclipse in the near future is old.
Edit
This gives you the ability to change a site's location without defining a new site
Show GPS
If the GPS is active this shows the GPS Information Window. Note that the GPS does not require this window to be open to operate.
Camera
Open
Camera->Open is the way to attach a camera. The dialog is described in Quick Start and in Learn Using this dialog you either Select a Camera or Select using a Simulator
If you are using a camera note that it may take some time for the camera to start. A progress wheel shows that the program is not hung.
Note also that the program requires the user to manually set some items in the camera/lens.
The simulator will allow to use the program, run scripts, and take pictures. It will not allow you to do operations that require a live camera such as focusing.
Camera Preferences
The Camera Preferences Dialog is broken into sections. An overview and pictures where shown in Learn. This will present what ever detail was missing from previous descriptions
Mount
The mount setting is extremely important for proper operation. This was described in Learn
fStop
This will appear differently depending on whether you are using a lens or attached to a telescope. This is described in Learn
Solar Filter
This selects which configuration to use for the solar filter. This is described in Exposures
ISO Limits
Your mount settings also place rules on how this is used. For "Tripod" and "Tracking" these merely place limits on what exposures can be used. In "Monopod/Ship" the highest usable ISO is always used as the first choice for exposures. Note that ISO 100 may be required for the fastest exposures. This should not be changed unless there is a REALLY good reason. You can still edit what is actually used using the Exposures Dialog described below
Camera Delays
These display the current delays used during burst, between priority images (diamond ring, chromosphere, and prominence ), and for non-priority (the rest). These settings can only be changed in the Test Delay dialog since I don't know what will work for your camera.
Extras
This controls two optional, but useful features
- Voice Inserts voice prompts into the task list. I have found these very useful, but some cautions for safety reasons
- Filters Off Means that the camera can now be exposed to direct sun through your optics. It is unsafe to look through your optics until you can confirm that you cannot see the sun through your safety eclipse eyeglasses.
- Chromo, Chromo This is intended as a reminder in case you forget stop looking through your optics prior to C3. Treat this as a fail safe. You should look away the first time you see a red band. This is the time to enjoy a second or so of diamond ring after a successful eclipse.
- Sync Time If your camera supports it the program will set the time in the camera to be the current run time.
Test Delay
This dialog allows the user to test different settings for the delays and find the best set for your particular camera. This turns out to be important. The two reference cameras that I used (a 60D and an 80D) prior to 2.0 test differently. (Hint: the 60D got a plane ticket)
The test simulates C2 with the camera taking bursts speed photos within the 6 second (I don't recommend changing this) of the transition to full totality. It then switches to priority spaced photos. Finally it takes a full set of Corona exposures. The test runs for about 40 seconds so be patient. Once the test completes CE will read all of the new images from the camera and match them to the expected images. This may take a couple more minutes.
Success means it captured all of the images it expected to capture with no errors.
Just remember if you speed up the Priority Times you should increase the number of exposures in the Scenario Editor or you might miss part of the event.
About the test
Remember for many cameras you are dealing with the analog world of mirrors and diaphragms moving (The program prevents you from using the electronic shutter for the entire eclipse since doing so will limit depth of your image capture. That will make it harder to convert your image set into an HDR representation.)
Being able to run your camera fast depends on a lot of factors.
- Your Camera
- Your Computer
- Your Lens (if you are using one). To take a picture the diaphragm in the lens must physically move. Your expectation should be that shooting with a lens will be slower than shooting using a telescope.
- Your Camera Memory Chip. Use the fastest available. In my tests my 60D was able to run at 0.6/sec per shot with a 150 MB/s chip and only 1.0 sec per shot with a 40 MB/s chip
What does success look like
Here is an example of a successful test
              Test did not cause a Camera Error

              Full Success all expected images found
              10burst images captured
              Average time it took to push the shutter (in msec) = 143.645
What happens if you get an error?
If an error occurs you will receive a diagnostic that describes the error
              Test did not cause a Camera Error


              Not all of the anticipated exposures captured
              Camera actually recorded Burst = 9{ vs 44} Prom/Chromo = 6 Corona = 5

              The program thinks it took a lot more pictures 44 then the camera actually recorded 9
              this is an indication that there is not enough delay between exposures.
              while you did not get an error, if the difference is more than one this is a FAIL

              All of the chromo/prom exposures captured
              All of the corona exposures captured

              Please try the test again with less aggressive settings
              Average time it took to push the shutter (in msec) = 35.629
As described in the status these settings were too aggressive for the camera. This version of the Canon software appears to just ignore camera shutter pushes when the camera is not ready for them instead of reporting a "busy" error. That being said this is not a stable configuration and would be treated as a FAIL.
The solution, as described in the message is to simply back off the setting. The success example was taken with a delay of 0.5 sec while the fail example used 0.1 sec.
Note that R series Cameras are treated specially. For these cameras the program WILL automatically switch to an electronic shutter during the bursts and switch back to EFCS for the remainder of the exposures. This will allow these cameras to operate as quickly as they can.
Note also that the R8 and R50 may use electronic shutter if that is required to properly expose in other cases. This is because the EFCS in these cameras is too slow for some exposures which would limit the camera if a fast telescope was used
Execution time
I expect to receive complaints that this function is now mandatory and the time it takes to complete is long. Based on the crashes I reviewed and the comments I received before the April 24 eclipse I am unsympathetic to either complaint.
This tries to emulate the sequence that will happen between C2 and the point where enough corona pictures have been taken to insure the camera has caught up writing the images it has taken. Yes that is about 40 seconds just as it will be during the actual eclipse
Version 2.0 also introduces a new post analysis since many folks got an ambiguous answer with the pre April 24 versions. This version will read the actual images taken and match them to the images the program thought it took. If they do not match it means the program is driving the camera faster than it is able to run. The results will be unpredictable. Thus a PASS requires a match even if that means slowing the burst interval.
Passing this test once is now mandatory since folks who avoided completing the test got into trouble later.
Demonstrate Exposures
This menu item was renamed in Version 2.0 since there was confusion concerning its purpose. This will demonstrate the settings that can take various images. It does not affect the image calculation.
This dialog is described in Learn. The window demonstrates which exposures are permitted to meet the exposure rules. It provides an example of one of my own pictures to demonstrate what a correct exposure looks like (or what a near miss looks like)
For many values the "correct" speed is not available in the camera. So this shows both the theoretical "best" and what the camera will support.
Live Camera Menus
Test Shot
This allows you to take a test shot with your camera. When it opens it defaults to your Solar Filter Exposure. Using is pretty straightforward - Just press "Take Picture". After a short time the picture will appear in the display window. You can shrink the picture to fit or display it at full resolution. Remember if you have a trackpad on 11.x you will have to scroll by dragging the image.
Pictures will have saved in your Documents Folder as described under Files
Focus
One of the key goals of this project was to improve the focus process. A detailed examples of using the Focus Function is presented in Learn
Start the process by pressing "Start". Keep in mind you are burning battery at a fairly good clip.
When fully zoomed out you can select a detail point by clicking it. The two rectangles show approximately where the zoomed views will be. By zooming in you can see more detail. Use the UP, DOWN,.. buttons to adjust where you are looking.
If you have a lens you can then directly adjust the focus with the side arrow buttons. If you have a telescope this is a good time to have a friend.
The Invert button converts the image to grayscale and inverts it. I find it makes it easier to see small spots as I demonstrated in Learn.
You may have to slow down the exposures to get a good image. The combo box allows you to do this.
Finally the Take Picture button brings you to the Test Shot dialog.
Note the spinner. This is controlling a piece of hardware that takes time to react. The spinner moves whenever a new image is received and will give you a clue regarding how fast the camera is reacting.
Time Sync
Depending on the camera model this will allow you to just display the camera time or to also set it to agree with RunTime. Note the time settable cameras also understand time zones. Since this program sets UTC it will not affect the time zone in the camera.
Depending on the camera model this will allow you to just display the camera time or to also set it to agree with RunTime.
Cameras (like the 60D) that do not understand time zones report whatever time is set in the camera.
Note for cameras that do support the time setting this changes your cameras timezone to UTC ( London + no summertime)
Download All Images
This is a new feature in version 2.0. If a script is not actually running then all of the pictures in the camera will be downloaded to a timestamped directory in "~/Documents/CaptureEclipse/User Download". All means all.
Each file will automatically be renamed such as
IMG_4030 2024-04-21T14_38_28,58 I-100 0,333sec.{raw type}
With the image ID, time camera took the image, ISO, and shutter speed. This uses the European convention of using , for decimal places.
Note that this feature is distinct from the also new feature to perform background downloads while shooting the partial phases. While that is a "best effort" download of "new" images this will download your cat and vacation pictures as well as any eclipse pictures.
Scenario
The Scenario Generator will convert the site circumstances (which are, in turn, derived from the eclipse and location) and the Camera Parameters along with some additional parameters defined in the Scenario Editor dialog to create a list of tasks that must be performed during the eclipse run.
As discussed in Learn there are actually two Scenarios editors; one for total eclipses and one for annular. The proper one is invoked based on the site information. I will be documenting these separately
Editor for Total Eclipses
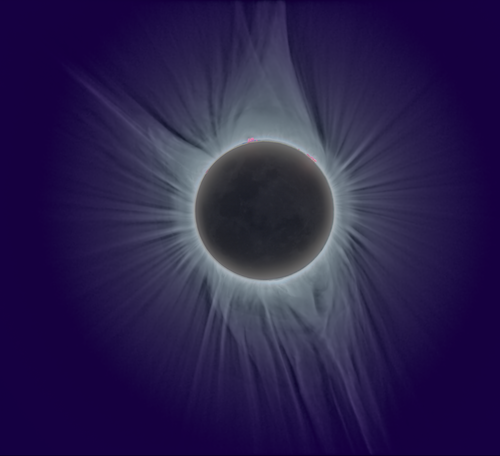
In this case more phenomena are available to be recorded. Total Eclipses are complex beasts that offer fleeting glimpses of the sun disappearing(reappearing) at C2 (C3) {Diamond Rings and Baily's Beads}, prominences and chromosphere peaking out before the moon covers (exposes) them, the corona which varies by many f stops of brightness so it is impossible to capture in a single exposure, and finally an image of a new moon illuminated by the earth. Capturing each of these events requires careful timing with different exposures that must be captured precisely on time.
OK so it is hard... Let's talk about the choices available to tune the capture. Let me start with the observation that in most cases you should just accept what is presented on this page and not change anything. There are some circumstances such as a short eclipse where you do not have a choice.
C1 C4
A burst set will be taken to capture C1 and C4. This allows you to control the length of the burst and whether to perform it. I can present no good reason not to accept the default
Partial
This will control whether and how many partial exposures are taken. The partial exposures serve the purpose of keeping the camera from entering power save. Thus I strongly recommend not turning this off. Whether an exposure every 5% or one every 20% is better is left to the user.
Diamond Ring
This is a slower exposure to try to get the ring effect right before (after) the photosphere is hidden (exposed). This can be your most dramatic shot. A picture of mine from 1970 was one of my best ever and hung in my parent's house for nearly 30 years.
Baily's Beads
This is one I don't give you the option of turning off. I further strongly recommend again changing the duration.
Chromosphere and Prominences
These are two exposures that are rather close. In the past I captured these serially (Chromosphere first). I am providing the option of mixing the two. I can give arguments for and against. These are both occurring at the same time. On the other hand prominences are still visible after the Chromosphere is not. Mixed there is a chance of just taking more Prominence pictures at the wrong exposure. On the other hand the moon is chopping off the bottom of the Prominences. Personally I plan to use the Mix feature.
Corona
Now we come to the first area where real choices may be required. If this is Texas 24 and you brought your AP 1600 mount then you can capture whatever you want. But what about on a ship in 23 where the eclipse is short and your max exposure is limited by your mount moving. Then some decisions might have to be made. We talked in Camera Preferences of one solution. If you set the mount correctly you will be moved to faster ISO and faster exposures. But you may opt instead to take fewer Corona exposures with the hope of getting a second set of Corona exposures. Ah the possibilities...
Earthshine
I regard this as a bonus shot. Yes I include an earthshine image when I build a High Dynamic Range of the Corona. This is one you have have to sacrifice in 23 (unless you are on a tracking mount, use the Exposure Editor, and use Test Delay to reduce the corona delay)
Background Download During Partial
This is a new feature in 2.0. During idle time during the partial phases CE will download any "new" images to a timestamped directory in "~/Documents/CaptureEclipse/Download Images/". As with the "Download All" function above the files will be renamed like
IMG_4030 2024-04-21T14_38_28,58 I-100 0,333sec.{raw type}
Two items to note.
- "New" means images captured after the start of the current run (so not all).
- This is a "best effort" download which means there is no guarantee that all of the eclipse images will be downloaded. A separate feature Under Camera->Live Camera {available when the script is stopped} will download all images
What this is useful for is satisfying several operational concerns I have had during previous eclipses.
- Confirming the focus is correct without requiring the user to stop CE
- Downloading your totality photos without stopping CE
- Confirming tracking without trying to look in your optical viewfinder or burning battery to enable the electronic displays
With this feature the user is able to switch to a different desktop and look at the photos (e.g with Preview). I would not recommend doing any editing.
Editor for Annular Eclipses
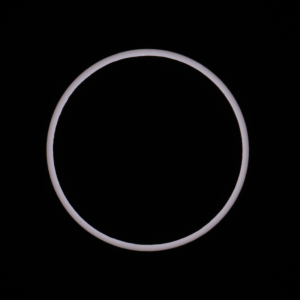
Annular Eclipses share the time up to almost C2. There is, of course, no Diamond Ring. The Prominences are not visible. Nor is the chromosphere or Corona. The only point of merit between C2 and C3 is max eclipse which itself becomes interesting
Max Eclipse
Unlike a total eclipse where Max Eclipse is largely just a point in time here most of you will want to capture the perfect ring. Thus we treat this as another time for bursts so you can capture the exact moment.
Fill
This allows you to fill the otherwise unused time between C2 and Max and Max and C3 with partial images. I thought these were useful in 2012.
Import/Export
The last two menu entries are for Import and Export. These are for the case where someone does not trust my choice of exposures. Export will save the eclipse into the Documents->CaptureEclipse->User Visible Scripts directory. It is XML formatted and should be pretty obvious of what the fields are for.
So a big caveat here is that I strongly recommend not doing this unless you really do not trust the image choices I made. These scripts are still relative to events so they should get the proper event times if you make a small shift in your location. They do not perform all of the error checking the Script Generator does when it works. So if you use this you accept the risk.
Time
The Time menu controls how Run Time is set. You will generally run in one of the Real Time modes. You will practice your task list in Practice. Emergency C2 is there is something goes wrong
Real Time Modes
The Real Time modes are described on the Time page
Practice
The three practice modes set the time to be before the C1, C2, and C3 events. This allows, for example, a complete run of the entire script. Alternative you can just practice totality. Finally you can practice the end of the eclipse.
- C1 - Starts shortly before C1 is to occur. If you want a complete run through then initially start here. If you do decide
to break at "Check your Focus" you can resume by starting the simulation at the C2 starting point.
I strongly recommend you do this at least once to verify your camera/computer have the necessary battery life. - C2 - Starts about 15 minutes before C2. This gives the opportunity to practice what you will do as the eclipse approaches. This is something I highly recommend you take advantage of
- C4 - Starts shortly before C4
You should not have a GPS installed unless you are in the eclipse track.
Emergency
This process has been totally redesigned to act as a fail safe way of leaving with some useful, although not ideal, pictures.
If something has gone wrong this will cause CE to replace your script with an emergency script with the goal of capturing something. This script is the bracketing I use when I do not have computer control. It will capture a good selection of the events, although because it is not sync'd to them not all of the exposures will be appropriate to what is happening when the exposure is taken.
This is your fallback in the event you do not have accurate time sync (or as I experienced in Texas you have limited views of the eclipse through the clouds). Again the goal is to bring back something as a momento.
Besides the menu Emergency can be trigger via a Control-Command-e or via the touchbar.
Files
The program saves many hidden configuration files in its Library folder. These are not intended to be edited. There is really no reason to since each of these can be edited with tools provided.
But there is another class of files that are user editable and/or provide information that the user requested. The folder containing these files is in "Documents". The folder is marked with Application's icon to reinforce that it is special. Here is what is in the various folders
Bessel
As said elsewhere predictions are made using a technique devised in the 1800's by Bessel which was refined by Meeus in the 1980's. The current implementation is based on a port of that work by Espenak, et al. This provides a more complete explanation. Fred Espenak's site publishes the Bessel Elements for each particular eclipse. For example, this is the set for the eclipse that occurred on 12/14/20 in the table labeled "Polynomial Besselian Elements". Note that this program actually uses the elements within the JavaScript of the associated circumstances calculator which have slightly more precision.
When the program starts it will look for a file {}->Bessel->CustomBessel.xml. If present it will load it.
When a site is created via New Menu item the Bessel currently being used is written to {}->Bessel as "Default" + {eclipse name} + ".xml". You can examine the parameters being used (I suggest using an xml editor such as xml notepad).
Live Camera
When you Take a Picture with Test Shot this is where it appears
Log
Each time you press Run it creates a new log. Mostly this contains debugging information, but there is some stuff that might be useful
- The type of run and which camera
- The relative times for Run Time, System Time, and Camera time. This may not appear immediately since the camera has to be asked.
- The location and event times. Note that each Location task repeats this so if a GPS is used a location marker is set about a minute after C3.
-
The RunTime of the image and how late the image executed
Task TakePict schedule at 04/08/24 18:40:51.8 Δexecuted 0.0007 comment Chromosphere
This indicates the command to take this Chromosphere exposure was issued at 18:40:51.8 and was late by 0.0007 seconds. Delays are almost always less than 0.05 seconds. It is one of the reasons you want this to be the only program that is running.
Note that during annular eclipses a special "marker" exposure is taken. This marks the end of a sequence of "C" or "max" exposures so the exact time of each exposure can be determined.
Download Images
This directory contains the files generated by Background Download During Partial
User Download
This directory contains the files generated by Download All Menu Item
Simulation Images
Anytime you run with the simulator it creates a directory where it places simulated images corresponding to the event being captured. These are from my own collection of images
User Visible Scripts
I realized when I was writing the program that some advanced users may not agree with the exposures or timings I use. Instead of just saying "sorry" I provided an escape hatch for them to be more creative. However, this program is intended to be used as documented so users need to be aware of the caveats should they choose this path.
- Using this feature is unsupported beyond this description. You will be performing a Beta Test. I have verified that the settings are restored, but if you do find a bug I may add it to be fixed in a future release.
- Simply changing the exposures is relatively safe as long as you follow the other precautions below. Changing the timing of the exposure is really risky.
- You should assume any manually generated script applies only to a single lat/long. The script has the ability to adjust the trigger times if you move, but requires the duration to not change which means you cannot move very far.
- This program is designed to use generated scripts. Thus if you open camera prefs or the script generator it will reset the script to new generated values
- Anyone choosing this path needs to extensively test the script for proper execution with your camera. You can do this in simulated time
If I have not discouraged you yet then here is the information you will need to understand the generated script. The script if formatted in XML. I use the app XML Notepad. You can open the file with a simple text editor, but what you will see will not be pretty.
Like any XML it is a list of keywords and values. Here are the keyword definitions that are not obvious
- TaskType This describes the kind of task to be created "Burst Image Task", "Priority" {i.e. Chromo and prom}, "Non Priority" {i.e. Corona}. There are also some other task types such as scripting prompts.
- Task Name What will be recorded in the log
- Time Offset Time of start of the event relative to the startref
- Startref One of the calculated events for the eclipse
- totaltasktime This is only used in Burst as the others are based on the exposure{ may be used for error checking}
- ImagePad how long to wait until the next image {not used in script execution, but may be used for error checking}
- Speed speed to set camera
- f stop f stop setting (or blank if telescope)
- iso iso
- ImageQ not used in script
- lduration must be the same as total task time
- luseHighSpeed Sadly Canon broke this feature so it is no longer used
Good Luck!
Frequently Asked Questions
I recognize that those that committed to a different camera brand would have preferred a release in Feb 24 with that support. Would I consider a version for Aug 26?
I reached out to Nikon to see if they offer a Software Development Kit like Canon does. They do, but it is poorly structured and one required component of the distributed SDK is x_86 only. Thus it is unusable for modern Mac development. Further, by agreeing to the IP restrictions of the Nikon SDK I have also precluded several avenues to overcome the limitations. I emailed Nikon marketing and received a response that "the release is not supported", but did not address any of the issues I raised.
I have no personal need for a Nikon product so I have little motivation to pursue this further. And with Version 2.0 I am adding additional code to better support certain Canon cameras.
email: captureeclipse@almadenobservatory.net
This started as a COVID sanity project to write something for myself. As it came together I realized it might be useful to others. I have put some work into areas that I do not intend to use myself (such as exporting scripts), but this remains largely a program I need.
The second issue is how much I would actually make if I did sell it vs the extra hassle that will cause. So Apple will take 30% off top. Income Taxes will take another 30-35% plus have secondary effects as income changes ripple into other areas. Finally it will increase the fees my account charges. So when all of that is done the result is pocket change.
This is to make the lens compatible with a telescope.
This program is intended to be used in full sunlight (well at least until the shadows disappear). To see the screen requires placing it in a box (I now use a tent)
After some experimenting I determined that dark mode made reading the display quickly much easier. Light mode is not disabled, but I think you will find Dark Mode gives better contrast in the field.
< /div>Actually during development the program used High Speed mode for almost 9 months. Then the Canon software changed and I was not able to get it to work reliably again. I updated to a new SDK version in the testflight version 1.2. Part of the test plan was to see if any of the more advanced cameras could now do high speed mode. I received no feedback so in the 1.3 release I retained my 1.1 "take pictures faster" operation.
Since I felt the high speed mode was risky in the first place I am not disappointed it is gone.
The method of predicting the circumstances of an eclipse dates back to 1824 and the work of Friedrich Bessel. Bessel figured out that that you could apply a series of polynomials to describe the positions of the sun and moon for the relatively short period of an eclipse.
In the 1980's Jean Meeus presented these equations in a form that was usable by modern computers. The current implementation is based on work my several people including Fred Espenak. For a more complete explanation see the page on the EclipseTimesCalc app.
The source of the Bessel parameters is Fred Espenak's website. Note that, before his death, Fred did not update his predictions for some recent inconsistency in the Earth's rotation. Thus I compare my predictions against Xavier M. Jubier instead.
The variable that undergoes the most significant changes is called ΔT, which represents the rotation of the Earth. This variable varies from the reference point in time upon which the models are based. My plan is to provide updates to ensure that the predictions remain current. However, if I fail to do so, the program will issue a warning indicating that the model is outdated.
The secret sauce is the input to those equations; the Bessel Elements. My source are the Fred Espenak websites, but I anticipated that these might change. Just in case I was not able to update in time the Custom Elements feature allows the user to provide an updated set of elements and use those instead of the ones built into the program. The file Documents/CaptureEclipse/Bessel/CustomBessel.xml provides a sample. The Bessel fields are laid out in the file. It is just a matter of editing this file and then selecting it in Site->New.
Basically because I am confident the ones Espenak calls for meet up with my own experience.
I did provide selections for Solar Filters because that was a case where One Size did not Fit All. There seems to be some disagreement over my Thousand Oaks exposure. After I returned from Texas I shot another test shot and still feel my exposure is correct; however, I added an additional setting one f stop slower.
Privacy
This app does not collect nor does it distribute any information about its operation.
If you have configured your Mac® under System Preferences->Security and Privacy->Analytics to share crash information with developers we will receive a report should your program ever crash. This is a Mac® feature that we have no control over.
keep nova happy