Overview
Using a Real Camera
This is also a good time to remind you of some settings that you will have to manually perform on the camera. In some cases the program can determine if they are made. In others it cannot and you will have problems if they are not set
- Camera Automatic Shutoff This needs to be set to either off or a long time
- AF/MF This needs to be set to MF
- Program Mode The dial needs to be set to M
- Image Stabilize This needs to be off
- White Balance For most cameras this should be set to AWB. Some cameras {e.g. one of mine} require an exotic setting that I did not want to impose as yet another option
- Image Review I would set this off since it just saps the battery
And while we are at it a reminder to either turn off sleep on your Mac® or set it for a long time. It is 90 minutes from C1 to C2. You will probably be letting the computer run during that time. While the partial phases are boring, you don't want your computer to take a nap.
Connect your Camera then start the App. Since you ran the Quickstart you will see the Open Dialog for the Texas 24 site. This one is fine. Accept it.
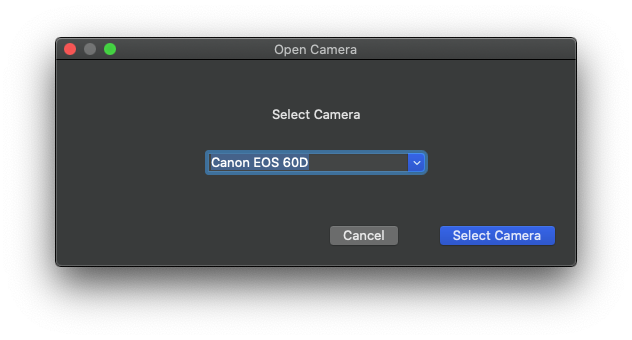
This time instead of the "Did Not Find" dialog you will get a dialog to select a camera.
When you accept the camera the Canon software may take a considerable time before it continues (it builds a catalog of its chip). The Button is replaced by a spinner to confirm I am not hung.
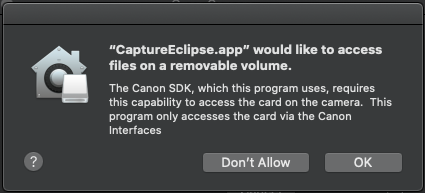
If you forget and and answer DONT ALLOW then you will have to fix the problem by going to System Preferences-> Security and Privacy-> Privacy-> Files and Folders-> CaptureEclipse.app and click Allow Removable.
You may also get a dialog to allow access to the Documents directory. This is where all of the user visible files are stored. You must say yes to this (CaptureEclipse is restricted to just its named directory) or the program will die a horrible death
One you have a legal and tested camera configuration the program will present the scenario dialog. Accept this.
Now you are ready to perform a test run with your camera. Select Time->C2 again. The main monitor window will be the same as what you saw before.
Note when we get to C2 the camera will start rapidly taking pictures. These are your Bailey's Bead Shots! Later I will show you how you can get even finer resolution.
A Short Eclipse
Note: This concerns the April 23 eclipse which is now just a memory. The text still conveys some valuable information since, for example, the sample 2026 Spanish site is not able to complete a full set of exposures either. If you would like to test the program with another hybrid eclipse you can use Nov 2031.
What this is telling you is there is not enough time to take all of the photos you requested.
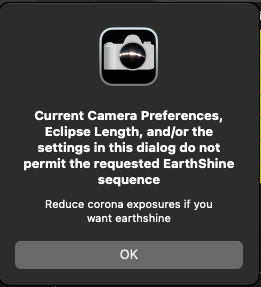
If you want to get creative you could reduce the corona exposures to allow the Earthshine to be take, but frankly Earthshine is both the longest and least important exposure of the set.
An alternative would be to reduce the delay between corona exposures using Delay Test; however, part of the reason for the delay is to allow the camera to catch up from the Burst Task.

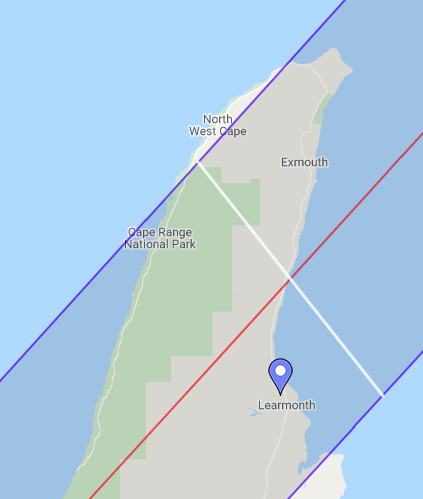
Annular Eclipse

Annular Eclipses will not draw the mass crowds of a Total Eclipse (since you will NEVER be able to look at the sun without eye protection), but being in the US it will draw people like yourself who are interested in eclipses.
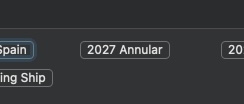
Open the program. If the Open Dialog is shown then Cancel and select Site->New. Version 1.5 includes a new sample site for the 2027 eclipse in Argentina the "2027 Annular" button. This will give the parameters for Mar del Plata, Argentina (south of Buenos Aires) which is on the track
A reminder. . .
During an annular eclipse the sun surface will always be exposed. It is NEVER safe to look at the sun without eye protection.
Note that it looks very different than before. Since Annulars are a different breed it requires a different tool.
Accept the dialog
Now have a look at the middle of the Annual period. Note how different the tasks are
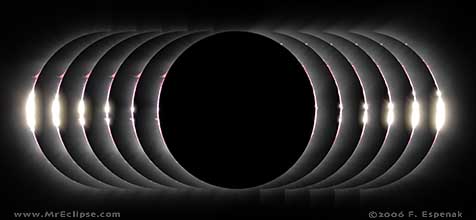
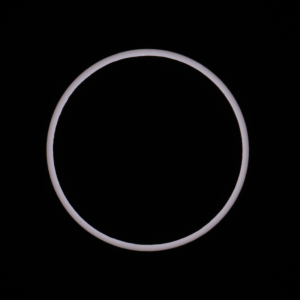
With annulars you want to capture a perfect picture of the ring (like mine above). Thus
we have another Burst at max eclipse.
As a reminder v 1.5 will automatically insert marker exposures into the scenario so the user knows which exposures are for the Cxs and max. The log can be then used to determine the actual exposure time.
Deeper Into Camera Prefs
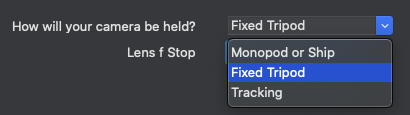
The dialog is divided into sections. Let's look at them one at a time
- Monopod and Ship This setting is for cases where either you are moving or when you are using a monopod to support your camera (which likely means you are on a ship). In this case the decision is to use the highest iso setting that gives an exposure. It will also not use an exposure that is slower than 1/100 sec. This should give you a better chance at a clear image.
- Tripod This is the case where you are using a conventional camera tripod. The sun will be moving while you take your image so you do not want to shoot too slow, but you don't need to be as aggresive as the ship case. This will select an exposure that is <1/2 second.
- Tracking In this case you have a tracking mount on land that is properly aligned. The exposure is limited to 2.0 secs
The second part of this section is to set the f/stop. This is a combination box if you are using a lens. If you are using a telescope this becomes a text box where you have to give the f/stop of your optics. This is required
The camera will tell the program whether it has a lens attached or not. If it says it does not then you are in telescope mode. You can simulate this by simply using the body cap for your camera.
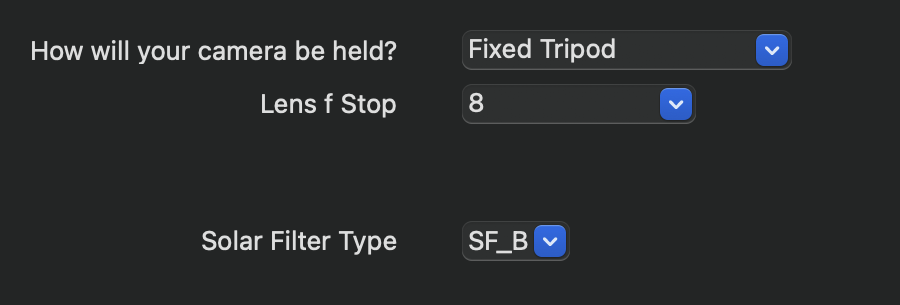
lens
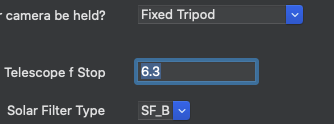
telescope
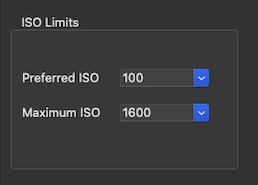
The next sets some of the operating parameters for the camera. In the Live Camera demo we used the default which uses the same value as the priority exposure time ( default 1 second). If your camera can support faster exposures this is where you enable it.
Press the Test Delay Button will allow you to test whether your camera can be more aggressive and take more exposures. See that section for more explanation.
The times for Burst Delay, Priority images (Diamond ring, Chromo, and Prom) and Corona Image are displayed, but they have to be modified in the tester. The defaults are probably OK, but different cameras may respond differently.
The last section is a miscellaneous which enables two optional features.
The first is voice where you hear prompts recorded by me of various events. SEM had these and I found them useful. I added some more
- A reminder to focus at C2 - 15 minutes
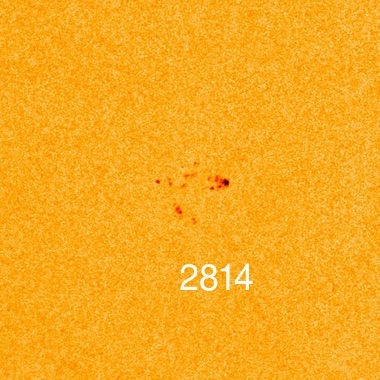
- A reminder the Chromosphere is about to appear shortly before C3
"Sync Time" depends on your camera type. If your camera allows the program to set the time then this is enabled. The 60D shown here does not. For more information see Camera Time
Exposures
In this program I made getting the exposures right a priority. For that I am relying again on "Mr Eclipse", Fred Espenak, and his paper How to Photograph a Solar Eclipse.. In that paper he presents an equation for calculating the correct eclipse exposure for each of the phenomenon. Over the years I have accumulated enough images to confirm that Fred's exposures for totality are correct.
Solar Filters
Unfortunately his settings for solar filters are obsolete. "ND4" is a type of solar filter referred to as "Photographic". It passes so much light that the only source I knew of stopped selling them for safety reasons. When I looked at the three filters I owned I found that all three had different sweet spots and none matched his "ND5"
Thus this program defines several solar filter exposures (which turn out to be one f/stop different). Note that I duplicated the Thousand Oaks filter since some users felt my original exposure was too fast. Based on my measurements. Your declare your filter type in the Camera Prefs dialog
- Thsand Oaks 1 and 2 Match the Solarlite filter made by Thousand Oaks. I provide two settings.
- SF_ND5 Matches none of the filters I own, but is the definition from Espenak
- Baader/Kendrick Matches a filter made with Baader Film such as those distributed by Kendrick.
- Orion Matches a glass filter made by Orion. This might be a tad underexposed, the sample below uses the Orion setting. Feel free to use the Baader/Kendrick setting if you feel that is the case
Neutral Density filters such as those sold by Lee Filters are not compiliant with safety standards. They are not supported by this product.
Since we are talking about solar filters this is good time to reiterate the warning under voice.
If you enable voice commands then one of the commands is "Filters Off". It is critically important to understand that command. This is the point where it is safe to expose your camera to direct sunlight. It is NOT safe to look through your optics at this point . In fact, until you visually confirm, with your safety eclipse glasses on, that the last bead is out (i.e. you see nothing) it is unsafe to look at the sun. I specifically did NOT put a "OK it is safe now" message in the program, but did include the "CHROMO CHROMO" warning to prompt you that visually it is unsafe. Even here, as I describe in my video series, if you see a band of red along an edge it is time to stop looking Right Now
The only 100% safe method is to NEVER look through your optics (or binoculars).